Showing posts with label Recipe. Show all posts

Saturday 8 November 2014

Lime basil

Lime basil took over my early lettuce rows. I'd grown it here last year and now I know that it's an abundant reseeder. I'd let it grow since early September when I set up these 2 rows, but now it was time to give the lettuce and the beets more room.
Abundant harvest of lime basil! I shared some with 2
new neighbors and then made a pesto with the rest of it.
The standard sweet Italian basil doesn't do well here with our hot, humid summers. It is prone to various wilt and fungal diseases, which forces growers to harvest it early. So on a whim I bought some lime basil seed from Burpee Seeds a couple of years ago. It not only makes it through the summers, it also reseeds, so it's unlikely that I'll need to purchase more seed any time soon.

The taste really does have a distinct lime overtone. I use it in the same as I do for regular basil, but since its flavor is strong, there are some dishes that I have learned to use less of it.

So this happened...

I planted an early crop of lettuce, beets, and a few white radishes at the beginning of September. It was a little too early for the lettuces and only a few seeds germinated, but the lime basil, which had been planted in this bed the year before loved the new planting rows and volunteered there.

When it became obvious that the lettuce crop would be lacking, I planted some more seed, but I left the basil in place. Well, the basil took over the whole area, as you can see in the top photo, so it was time to give the lettuce some light and room. I did not want to disturb the roots, so I cut off the stalks just above ground level and this made for an abundant harvest. I gave half of it away to two new neighbors and made pesto with the other half. In this pesto, I used equal amounts of garlic chives and basil—in addition to the onion and other ingredients. (You can see how I make pesto in my post: A field trip, A Florida native plant hero, & a pasta salad.) This time I used about a third of the pesto for a Mediterranean pasta salad and I froze the rest.

Now, the lettuce and other crops have more room to grow. Some lettuce, like the black-seeded Simpson have been mostly harvested.A week after cutting off the lime basil, it is already sprouting, but frost will kill it in December. 
These containers of pesto will allow us to enjoy this harvest when there is no fresh basil available from the garden.

I love the loose leaf salad blend. So pretty and so tasty. I had already harvested some of the red butter leaf  lettuce leaves from the outside of the plant, but you can hardly tell. Some oakleaf lettuce is making a good start for a later. harvest

One parsley plant left from last year's crop. Normally, this is a biennial and takes 2 years to complete its life cycle, but here in north Florida, our season is so long that parsley sets flowers in the same season as it is planted. But this one plant that was grown in a container did not, so now I have a little fresh parsley to use early in the season. My new crop has sprouted, but it will be a couple of months before it's established enough for picking.
We don't have any citrus plants in our yard, but many of our neighbors have too much. Ample Harvest is a matching service for people who have too much of a good thing with organizations that can use the surplus. How sustainable!

Time to turn the compost pile

With all the fall leaf supply, it was time to turn the compost pile. Looking from pile B toward pile A.The okra stalks have not rotted in the compost pile A yet, but they will.
With the abundance of fallen leaves, it was time to turn the pile. Besides, the old pile was almost cleaned out and I needed the compost from the bottom of pile A (near the shed). I scraped the rest of the compost from pile B (near the cement pad) and put it in the old wheel barrow. I laid in about 6" of raked leaves for the floor, and added alternating layers of 1) unfinished compost from pile A, 2) raked leaves, and 3) thin dusting of finished compost from the wheelbarrow. After the finished compost layer I poured a watering can of rain barrel water.

Since the turning, I've added a layer of kitchen scraps and more leaves. I will continue to add layers of alternating green and brown materials until the end of the year and then let it rest until spring when the whole process will begin again.

As expected at the bottom of the pile A, there was a good supply of moist, rich, finished compost. I'm using this compost to enrich the winter veggies beds (which you can see in the above photos), store some of it in a bin (next to the potting bench) for winter use, and use the rest of it to topdress my recently planted woody plants and others that I want to push a little more. While I never put amendments in the planting holes, a layer of compost laid outside the root ball area several times during the first couple of years after planting will entice the trees' roots to grow outward. Wide-spreading roots make plants more wind-tolerant and more drought tolerant and this is important in Florida where we have and 7-month dry season each year and tropical storms on a regular basis.


Native flowers

Oh my! It's hard to beat the dune sunflowers for beauty and durability. This one is part of our mailbox planting. This one plant has spread across the whole bed and has lasted for 3 years. I trim it back to keep it within its boundaries and use those cuttings to make new plants.

Our state wildflower!

I renewed my membership in the Florida Wildflower Foundation and they sent me seeds with my new card. I've sowed these seeds in a meadow area and look forward to seeing more of these cheerful tickseed flowers in the spring.

I trust that you are enjoying your fall gardening.

Green Gardening Matters,
Ginny Stibolt

A beautiful sunrise as reflected in the St. Johns River. 

Wednesday 29 October 2014

Beautyberry bread

Gathering the berries. I used only the ones at the ends of the branches because they
are the last to ripen.

I robbed the birds!

Many birds feast on our beautyberries (Callicarpa americana) including mockingbirds, catbirds, and cardinals.  So I felt guilty removing even one cup of their winter berry supplies, even though I have a dozen bushes plus more berries on the wax myrtles. But I saw a recipe for beautyberry cake in Peggy Lantz's new book, Florida's Edible Wild Plants and wanted to try it. I tasted a few berries right off the bush. They were fairly bland and only slightly sweet.

It didn't take long to gather the 1 cup of berries...
I modified Peggy's recipe to fit with the ingredients that I had on hand and added nuts and sunflower seeds to make it more of a bread.

Ingredients:

1 1/2 cups flour
1 teaspoon baking soda
2 teaspoons baking powder
1/2 cup old fashion oatmeal (Peggy used wheatgerm)
1 teaspoon vanilla
1/2 teaspoon nutmeg (Instead of the vanilla and nutmeg, she used ground ginger root)
2 eggs, beaten
1/3 cup olive oil
1/2 cup brown sugar (Peggy used honey and molasses)
1/4 cup hot water
1 cup beautyberries, washed
1/2 cup chopped walnuts
1/3 cup sunflower seeds, roasted and shelled

Preheat oven to 325 degrees and grease one 9" x 5" loaf pan. Mix the dry ingredients in a bowl, in a separate bowl mix the eggs, sugar, oil and hot water, add the liquid mixture into the dry ingredients, and then fold in the beautyberries, nuts and seeds. Pour batter into the pan and bake for 40 minutes or until the bread cracks on top.

Verdict: The bread was dark, moist, and quite tasty. Both my husband and I liked it, but neither of us could really taste  beautyberries in the bread and wouldn't know they were there except for getting occasional seeds stuck in our teeth. It's sorta like carrot cake where you can't really figure out where the carrots went, but you can still count it as a serving of vegetables anyway. :-)

The bread is beautiful: as it should be.Hot out of the oven, the pat of butter melts readily. For
subsequent slices, we'll zap them in the microwave for 45 seconds.

Out and about...

A Muscovy duck and a large brood in a Chick fil-A parking lot. Hey what's in those sandwiches anyway?

A mound of mushrooms at the foot of a live oak tree is beautiful in the morning light.

Root beer anyone?? How's this for a catbriar tuber? We were clearing an overgrown area at the edge of the elevated drainfield for the septic system. The catbriar (Smilax ssp.) vines were as thick as my thumb, so I knew there was a tuber, but I did not expect one this big.

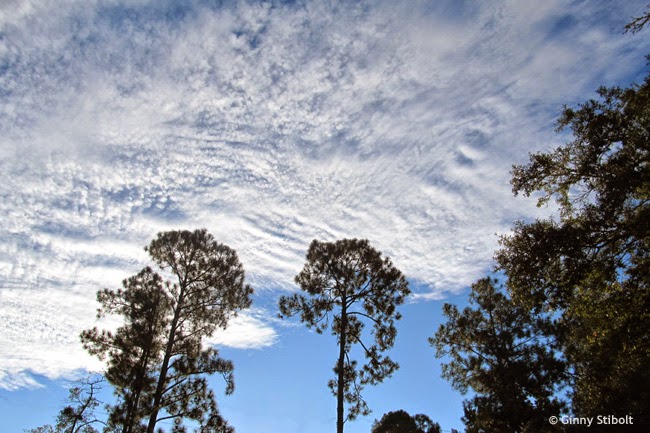
The other day, the skies were filled with a wide variety of cloud types. Beautiful.
October is supposed to be one of our 5 wet months, but the dry season has started early this year with not only no rain, but also record heat. We only received 1/2 an inch of rain early in the month and none since then. (The 30-year average rainfall in October for our area is 3.86".)  Don't forget to water your winter vegetables and if you've planted new trees and shrubs this year, be sure to give them extra irrigation as we move into winter so they'll get a good start on their spring leaves.

And most important, vote green and YES to Florida's Amendment #1.

Green Gardening Matters,
Ginny Stibolt

Thursday 8 May 2014

Vegan Dandelion Pesto


Okay Kids, what about those dandelions? They are beautiful...okay take a second look and really look at their beauty. Right you see it now! I was weeding the garden and looking at all of the dandelions that I was throwing away. I am sure that I can do something with all of this "waste". What about Pesto, ever heard about arugala pesto? Here is the low down... I was so surprised at how unbitter this pesto was, really it was so delicious that I just had to make it again... and again! So surprised!


Dandelion Pumpkin Seed Pesto

Makes Makes about 2 cups

Ingredients

  • ¾ cup unsalted hulled (green) pumpkin seeds
  • 4 garlic gloves
  • 2 tablespoons nutritional yeast
  • 1 bunch dandelion greens (about 6 cups, loosely packed)
  • 1 lemon juiced
  • ½ cup extra-virgin olive oil
  • ⅛ cup water
  • 1 teaspoon kosher salt
  • Black pepper, to tasted

Directions

Place pumpkin seeds in a large skillet and roast over medium heat. Stir consistently until golden brown and you can hear they pop a little. Remove from the pan and allow to cool.
Pulse the garlic and pumpkin seeds together in the bowl of a food processor until very finely chopped.
Add nutritional yeast, dandelion greens, and lemon juice and process continuously until combined. Stop the processor every now and again to scrape down the sides of the bowl. The pesto will be very thick and difficult to process after awhile — that's ok.
With the blade running, slowly pour in the olive oil and process. Add the water a little bit at a time until the pesto is smooth. Add salt and pepper to taste.


Here is a tip for you all, when using your Cuisinart, the most difficult thing about the Cuisinart is having to clean that silly lid. So a way I fix that is to wrap the lid is plastic wrap. Then when I am done I just unwrap the lid and viola!